
Happy Monday, friends!
I have my Project Life Week 8 spread to share with you today and a bit about the process I use put my spreads together.

I actually attempted Project Life last year in mid-March. I made it all the way to August, but then I totally lost interest. I was spending too much time putting the weeks together, I didn't always have a lot of great pictures or stories to tell, and I struggled with the overall design of my spreads. I know, I know, you're not supposed to stress over all those "little things" and just get it done, right? For me, that wasn't going to happen...I'm way to OCD when it comes to my creations and if something is going to stick, I've got to have some sort of routine or process that works and that I enjoy doing. In the back of my mind, I knew I was going to give it another go in January...clean slate, fresh start, and it was actually one of my New Year's resolutions!
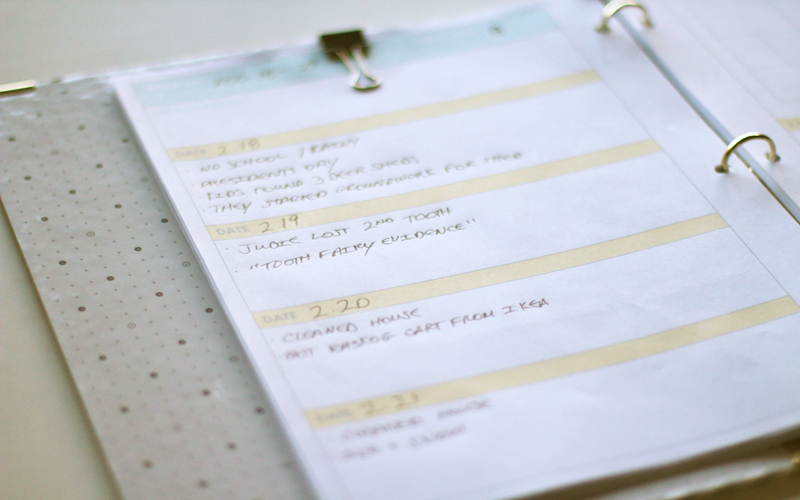
When I started PL this year, I knew I needed some sort of "game plan". I needed a better way to keep track of my thoughts, our daily life activities, and I needed some sort of system for putting it all together in a timely manner. I found these great planner pages (above photo) from www.marcypenner.com and they are super helpful in tracking my thoughts and activities throughout the week. I journal the major highlights of each day and add in anything extra that I want to remember when I'm putting my weekly spreads together. They're free and I highly recommend using them to streamline the PL process!

Another part of my PL "game plan" is having a few reoccurring elements in my spreads each week. This helps me keep things a bit more cohesive. I like to have a screenshot of the weekly weather forecast in our area, a "date card", and a filler card that has the week number on it (see photo below). With these elements already in place, I can spend a little free time before the week is even over setting up my spread. I typically use the Design A page protectors from Becky Higgins and I start my weeks on Mondays, not Sundays, which is just a personal preference :)

I also find it helpful to gather supplies and embellishments that I want to use before I choose my photos. I don't always have a color scheme in mind at the beginning of the week, but once I start sorting through my stash, one becomes evident pretty quickly. Last year, I tried to choose my photos first and it was a HUGE mistake, at least for me, anyway. I'm much more inspired when I have the color scheme already chosen and I can add or take away certain elements when I'm putting the spread together at the end of the week. I find it's easier to take something away then to spend too much time searching for just the right filler card or embellishment at the last minute :)

Another timesaver I came up with are these "photo fillers" I made out of some scrap card stock. I'm a mover. I like to move things around (a lot!) before I glue them down. I've always been a girl who likes to have a lot of options and who likes to exhaust every last idea or arrangement before I commit to a final design, ha! So before I waste time and photo paper, I place these "photo fillers" on my pages to give me an idea how my spread is going to look without all that commitment. This has helped me out tremendously! I just cut out some scrap card stock in the sizes that I use most in my PL and labeled each card so I know what size to print when it's time. Such a simple, but effective idea :)

At the end of the week (usually on Saturday or Sunday), I start sorting through my photos. I've found that if I make time to do this on a certain day each week, it helps me keep up my PL routine. I use my iPhone 4s as my main photo-taking device for Project Life...it's just too handy not to. I also post to Instagram (username @adriennealvis) daily, which helps me remember key moments from my week, as well. Some weeks I have tons of pics and some weeks I don't. On the weeks where there aren't a lot of photos to choose from, I decorate and embellish more "filler" cards or try to add journaling cards about things that are currently happening, things that I'm into (see photo below), pop culture events, etc. There is always something that can be recorded, sometimes you just have to think outside of the box or think, "what would someone fifty years from now want to know about our daily lives?".


Sometimes, I like to mix things up a bit and make a few of my elements "interactive". I also don't love my handwriting so sometimes I hide it...


I hid my journaling about my son losing his second tooth behind the manila tag. Just add a little washi to both sides of where you want it to open and voila, you have an instant interactive hidden journaling spot!

I even added a little clear pouch with the glitter that the tooth fairy had left behind in his room in one of the 4x6 pockets!
And here's what page 1 of my spread looks like...

And page 2...

And here's a look at the full spread...

Ok, so let's recap and break it down in a few simple steps...
1. Keep notes throughout the week.
2. Choose your color scheme before you print your photos.
3. Set aside a specific time each week to work on completing your spread.
4. Don't stress too much...if you miss a week, try condensing it and making a spread into two weeks.
5. Have fun and try different approaches to see what works best for you!
So there you have it...a peek at how I attack this amazing project!
Here's a list of some of the tools that I use in each weekly spread...

1. Date stamper. I have several made by different companies. I really like my Dear Lizzy one.
2. Wood veneers. I buy mine from Studio Calico and Freckled Fawn.
3. Tiny scissor snips and spray ink. I like Color Shine by Heidi Swapp and Mister Huey's from SC.
4. A good journaling pen. I prefer a felt tip Sharpie or a Smash one from K&Company.
5. Tim Holtz Tiny Attacher. I literally can't do any kind of paper project without this!
I also want to say that I am all about using printables for this project. I don't have enough time to make my own journaling and filler cards so I prefer to print them out from my home printer once I've downloaded them from the Internet and then embellish them (or not) to my liking. My favorite printables come from Studio Calico, HelloForever, Life.Love.Paper, and Blinks of Life. I also use the digital Project Life Seafoam Edition Core Kit which is also fabulous. You can find it at AC Digitals. There are also a ton of free printables that you could use that you can find online, try Googling "project life free printables". I am patiently waiting for my Studio Calico Project Life kit...been on the waiting list since January, so I'm pretty excited about that!
Ok, I think I told you all I can about the way I compile my spreads for Project Life, but I'm sure there's something that I've forgotten and will remember when I go to bed tonight :) I hope you enjoyed my thoughts on this project and I hope you'll give it a try...it really is worth it! I promise!!!
Have a great day and TFL!
Love this spread and all of the tips, very helpful and fun to see your process :) I'm starting to wish I did 12x12 now!
ReplyDeleteThank you, Michelle! I love your PL and the Handbook size you used :) xo
DeleteI love your PL spreads and layouts. Really enjoyed reading about your process and tips. I find that when I pull items and decide on a color scheme before getting started on my speads that I use more products from my stash (which I love) and that the process goes so much smoother. I thought your tip about using card stock scraps to cut photo templates for sizing was brilliant. I received my first SC PL kit in February and loved using it these last couple of weeks. Have you heard if you are going to receive the March Kit? Hope so! Thanks for sharing your work and tips!
ReplyDeleteShawn
Thank you so much, Shawn! I should be getting the SC kit in March...I'm so excited!!! And I like using up my stash that way, too :)
DeleteI can honestly say this has been the most useful project life post, I've ever read. This is my first time of doing PL and sometimes I worry I'm doing it wrong - yes I know, no right or wrong. But I do have a tendency to over think things and worry I'm not doing it the same as everyone else. I signed up to a studio calico class at the beginning of the year for ideas, but I don't think it helped me half as much as this post. Thank you. You really inspire me
ReplyDeleteOh, Sandra, you just totally made my day! I'm so glad that this post has been so inspiring to you :) Thank you so much for your kind words, xo
DeleteLove your approach and your PL Adrienne!
ReplyDeleteThank You~
Thank you so much, Alexandra! xo
Deletewow, adrienne...this is a great post. love the way you go about this. so happy it works for you. and really appreciate the weather forecast idea. going to have to add that in the future.
ReplyDeleteyour work continues to rock!
~jamie
Thank you, my friend! xoxo
Deletegreat post! I'm always curious to see/read about how others go about their PL's. And you rocked the printables. LOVE.
ReplyDeleteThank you so much, Tina! xoxo
DeleteGreat post! Thank you for the look inside your process!
ReplyDeleteThanks, Nicole! xo
Delete